And the power to screw up. That sums up how I was feeling when I decided to replace the bearings on my commuting Powertap this weekend. I had just gotten my training Powertap back from Saris for a similar repair, but that one was covered warranty. This one was not.
The potholes and rough winter riding conditions had caused one of the bearings to freeze up and I was a weird swaying sensation at times when I used this wheel. I found some 6901 cartridge bearings on sale (the Powertap hub uses four). If done right, this whole repair would cost me just $25. I had replaced bearings in other hubs before, so my confidence was pretty high.
Well, taking the hub apart was easy. I didn’t need to remove any of the electronics and I was able to tap out the old bearings with a screwdriver. I also pressed the new bearings in with a simple bolt and washers setup. Things were going great and until I installed the cassette.
The old freehub shell was alloy and fairly worn down, and I ended up cross threading the lock-ring. Crap. Talk about a rookie mistake. Well, the freehub was pretty much gone and I probably needed a new one anyway, so I ordered one from Saris.
Yep, easy to take apart, easy to put back together, and easy to screw up even at the end.

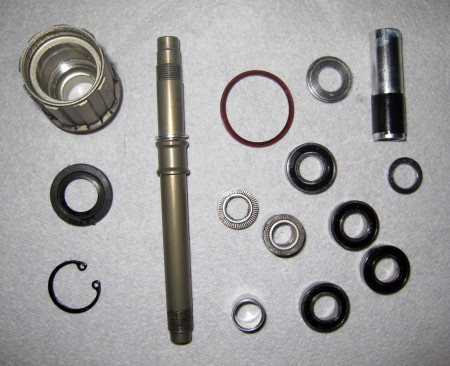
Here are the axle, freehub, and bearings from a Powertap hub.
Permalink
Hi,
I would like to replace my bearings in my SL+ PT but I’m a little leary in doing so. Would you have a procedure in taking the bearings out?
Thanks,
Jack
Permalink
I just used a flathead screwdriver and a hammer. That works for pretty much any cartridge bearings, but also ruins the bearings…:)
Permalink
The torque tube comes out with the bearings. The easy way to re-install is to place the drive side bearing on,
then the torque tube making sure the magnet is on the drive side, place in the hub and then the non drive side bearing and then tap both into place.
The Cassette requires you to finess the two bearings so they spin freely when you re-install. If it is too tight the inner bearing needs to be pressed out a little to free it up.
http://www.neuvationcycling.com/media/R-Series-Hub-Maintenance.pdf shows how to do it.